Zint: Manual
3. Using Zint Barcode Studio
Zint Barcode Studio is the graphical user interface for Zint. If you are starting from a command line interface you can start the GUI by typing
zint-qtor on Windows
qtZint.exeSee the note in section 2.2 Microsoft Windows about Microsoft Defender SmartScreen.
Below is a brief guide to Zint Barcode Studio.
3.1 Main Window and Data Tab
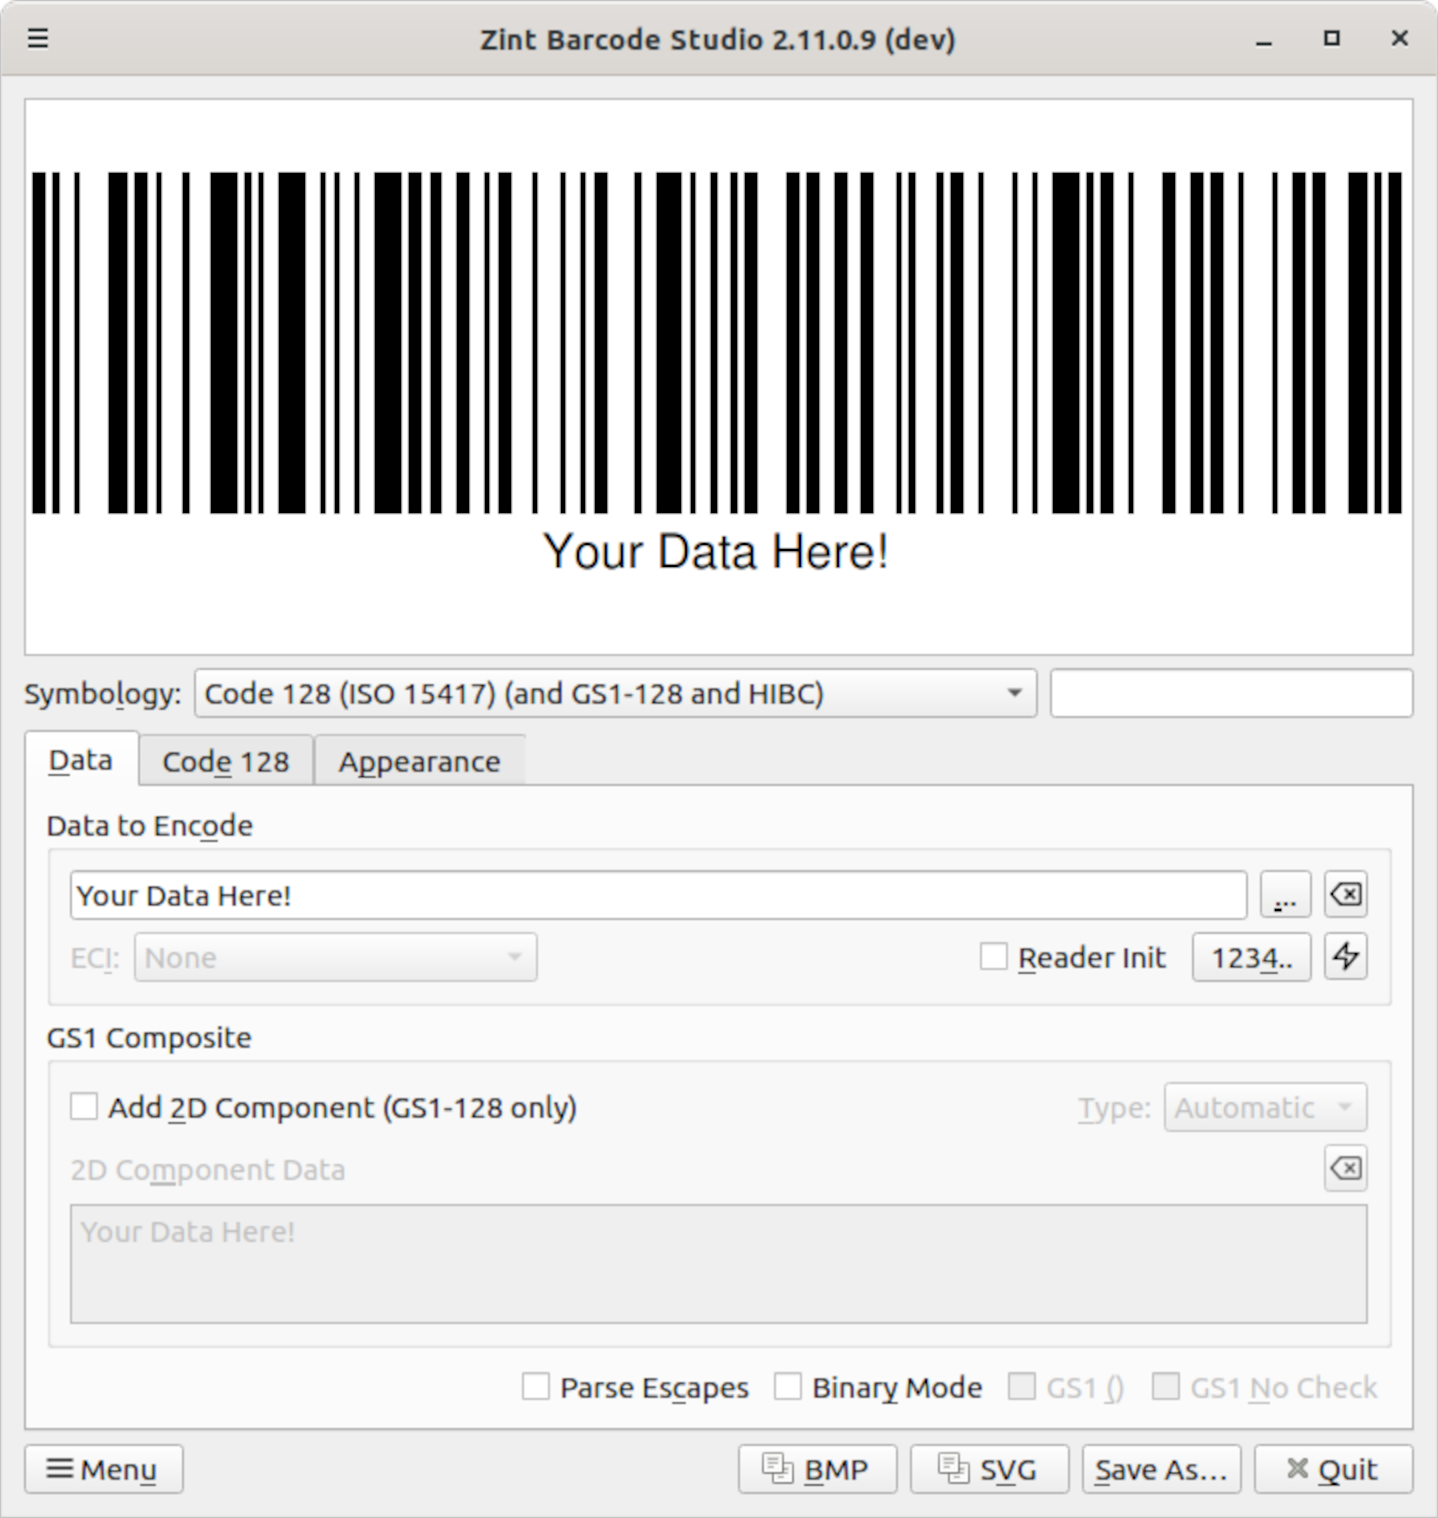
This is the main window of Zint Barcode Studio. The top of the window shows a preview of the barcode which the current settings would create. These settings can be changed using the controls below. The text box in the "Data to Encode" groupbox on this first Data tab allows you to enter the data to be encoded. When you are happy with your settings you can use the "Save As" button to save the resulting image to a file.
The "Symbology" drop-down box gives access to all of the symbologies supported by Zint shown in alphabetical order. The text box to its right can filter the drop-down to only show matching symbologies. For instance typing "mail" will only show barcodes in the drop-down whose names contain the word "mail". Each word entered will match. So typing "mail post" will show barcodes whose names contain "mail" or "post" (or both).
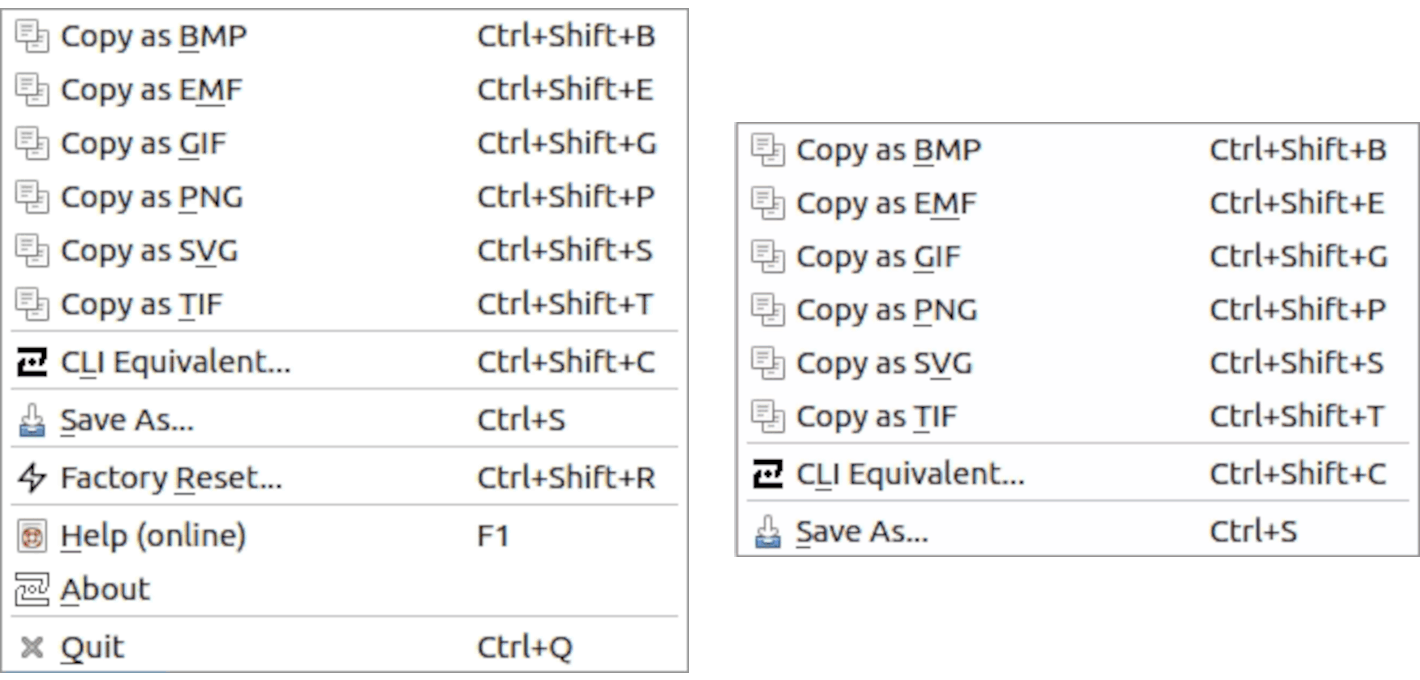
The "BMP" and "SVG" buttons at the bottom will copy the image to the clipboard in BMP format and SVG format respectively. Further copy-to-clipboard formats are available by clicking the "Menu" button, along with "CLI Equivalent", "Save As", "Factory Reset", "Help", "About" and "Quit" options. Most of the options are also available in a context menu by right-clicking the preview.
3.2 GS1 Composite Groupbox
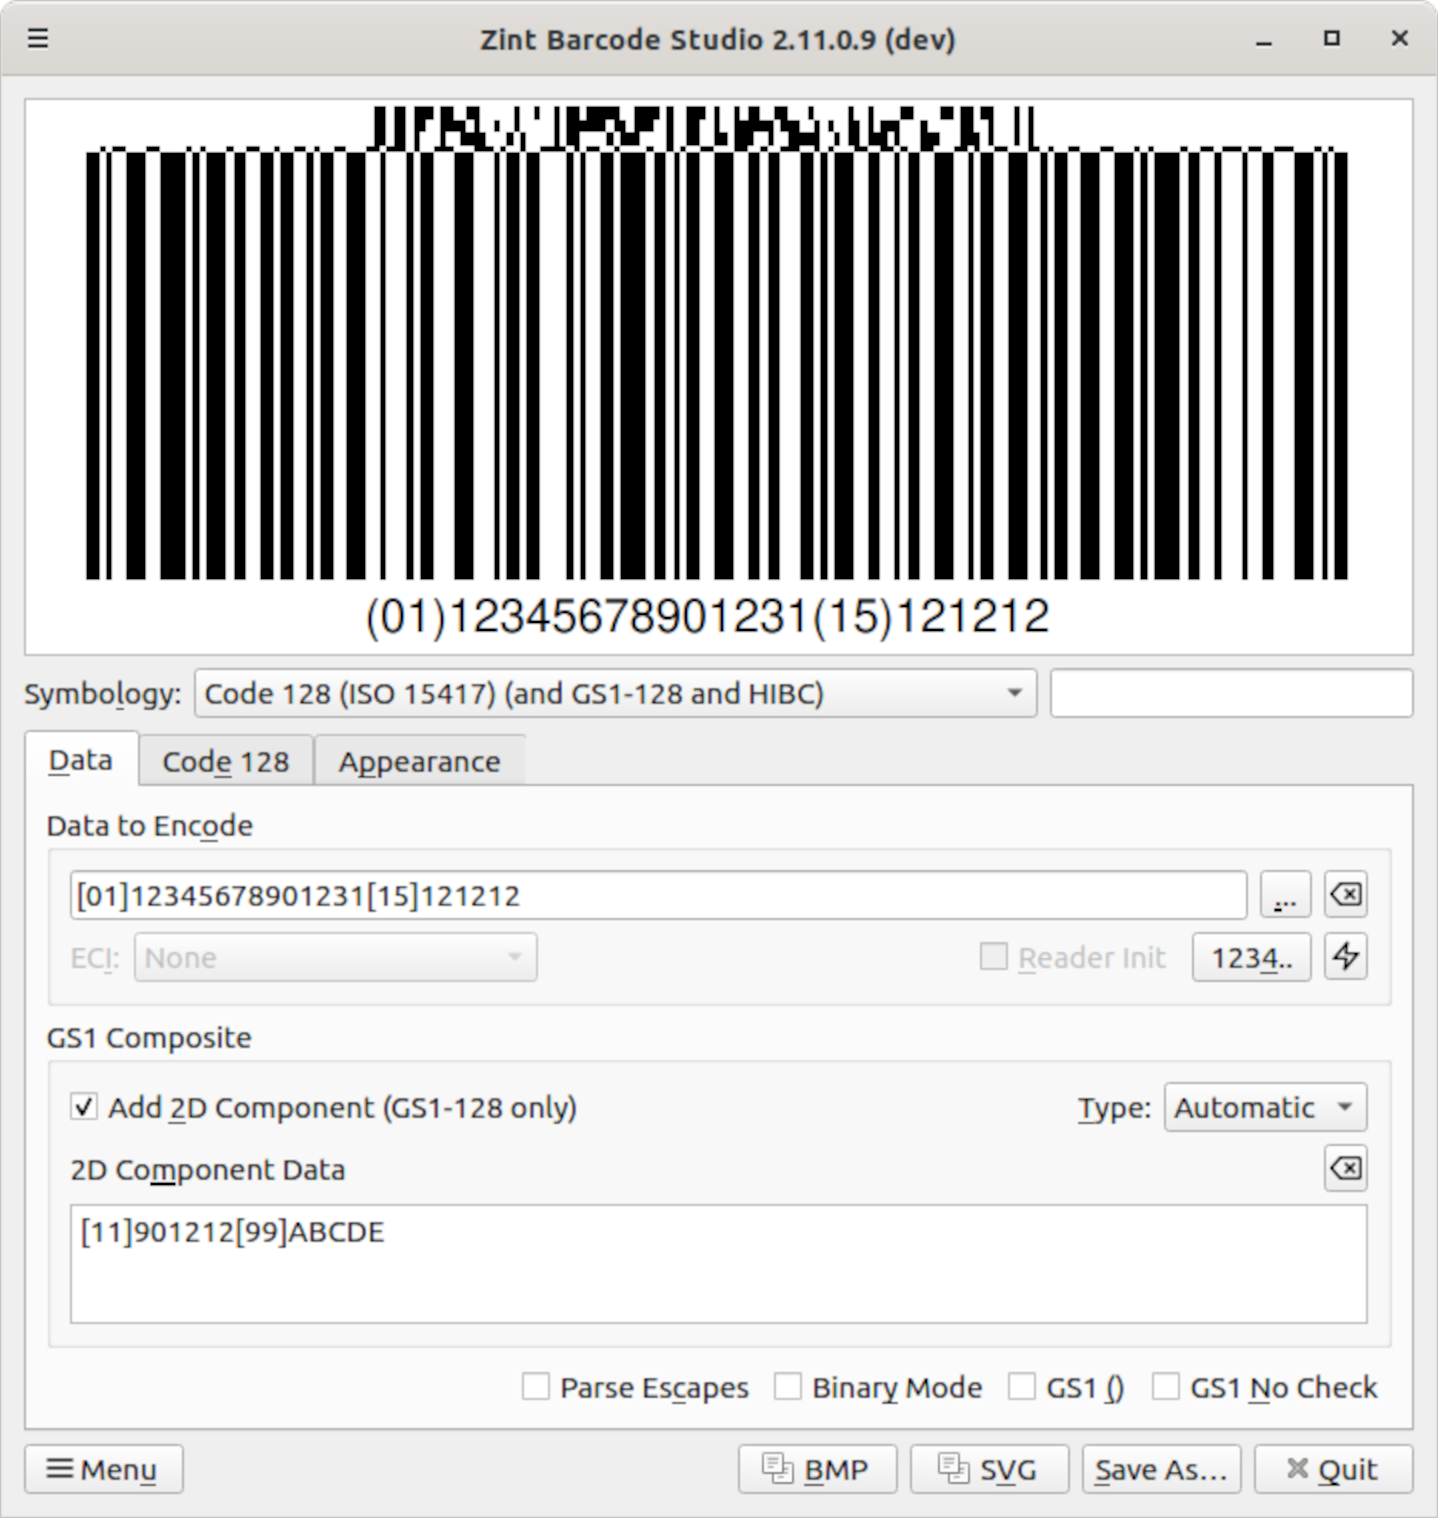
In the middle of the Data tab is an area for creating composite symbologies which appears when the currently selected symbology is supported by the GS1 Composite symbology standard. GS1 data can then be entered with square brackets used to separate Application Identifier (AI) information from data as shown here. For details, see 6.3 GS1 Composite Symbols (ISO 24723).
3.3 Additional ECI/Data Segments Groupbox
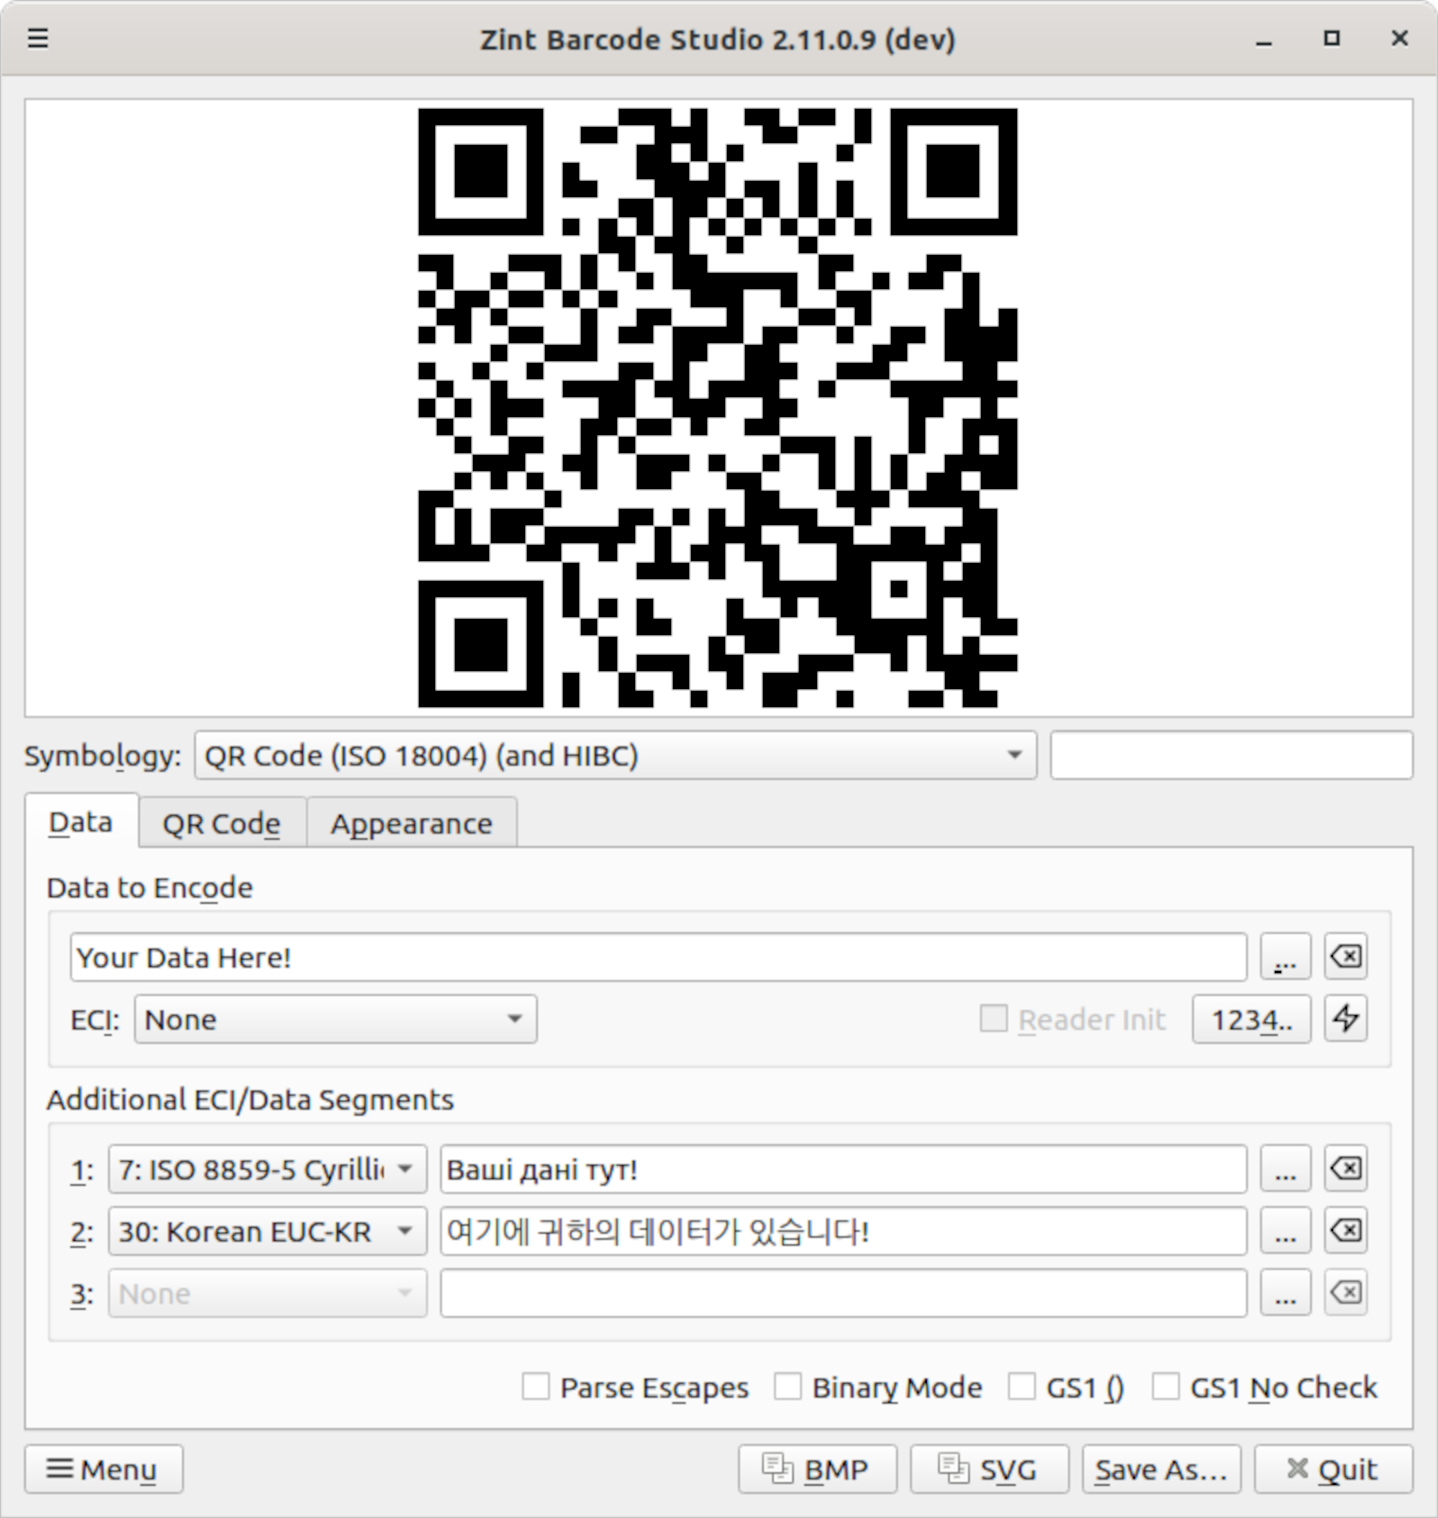
For symbologies that support ECIs (Extended Channel Interpretations) the middle of the Data tab is an area for entering additional data segments with their own ECIs. Up to 4 segments (including the main "Data to Encode" as segment 0) may be specified. See 4.15 Multiple Segments for details.
3.4 Symbology-specific Tab

For a number of symbologies extra options are available to fine-tune the format, appearance and content of the symbol generated. These are given in a second tab.
Here the method is shown for adjusting the size or error correction level of an Aztec Code symbol, selecting how its data is to be treated, and setting it as part of a Structured Append sequence of symbols.
3.5 Appearance Tab
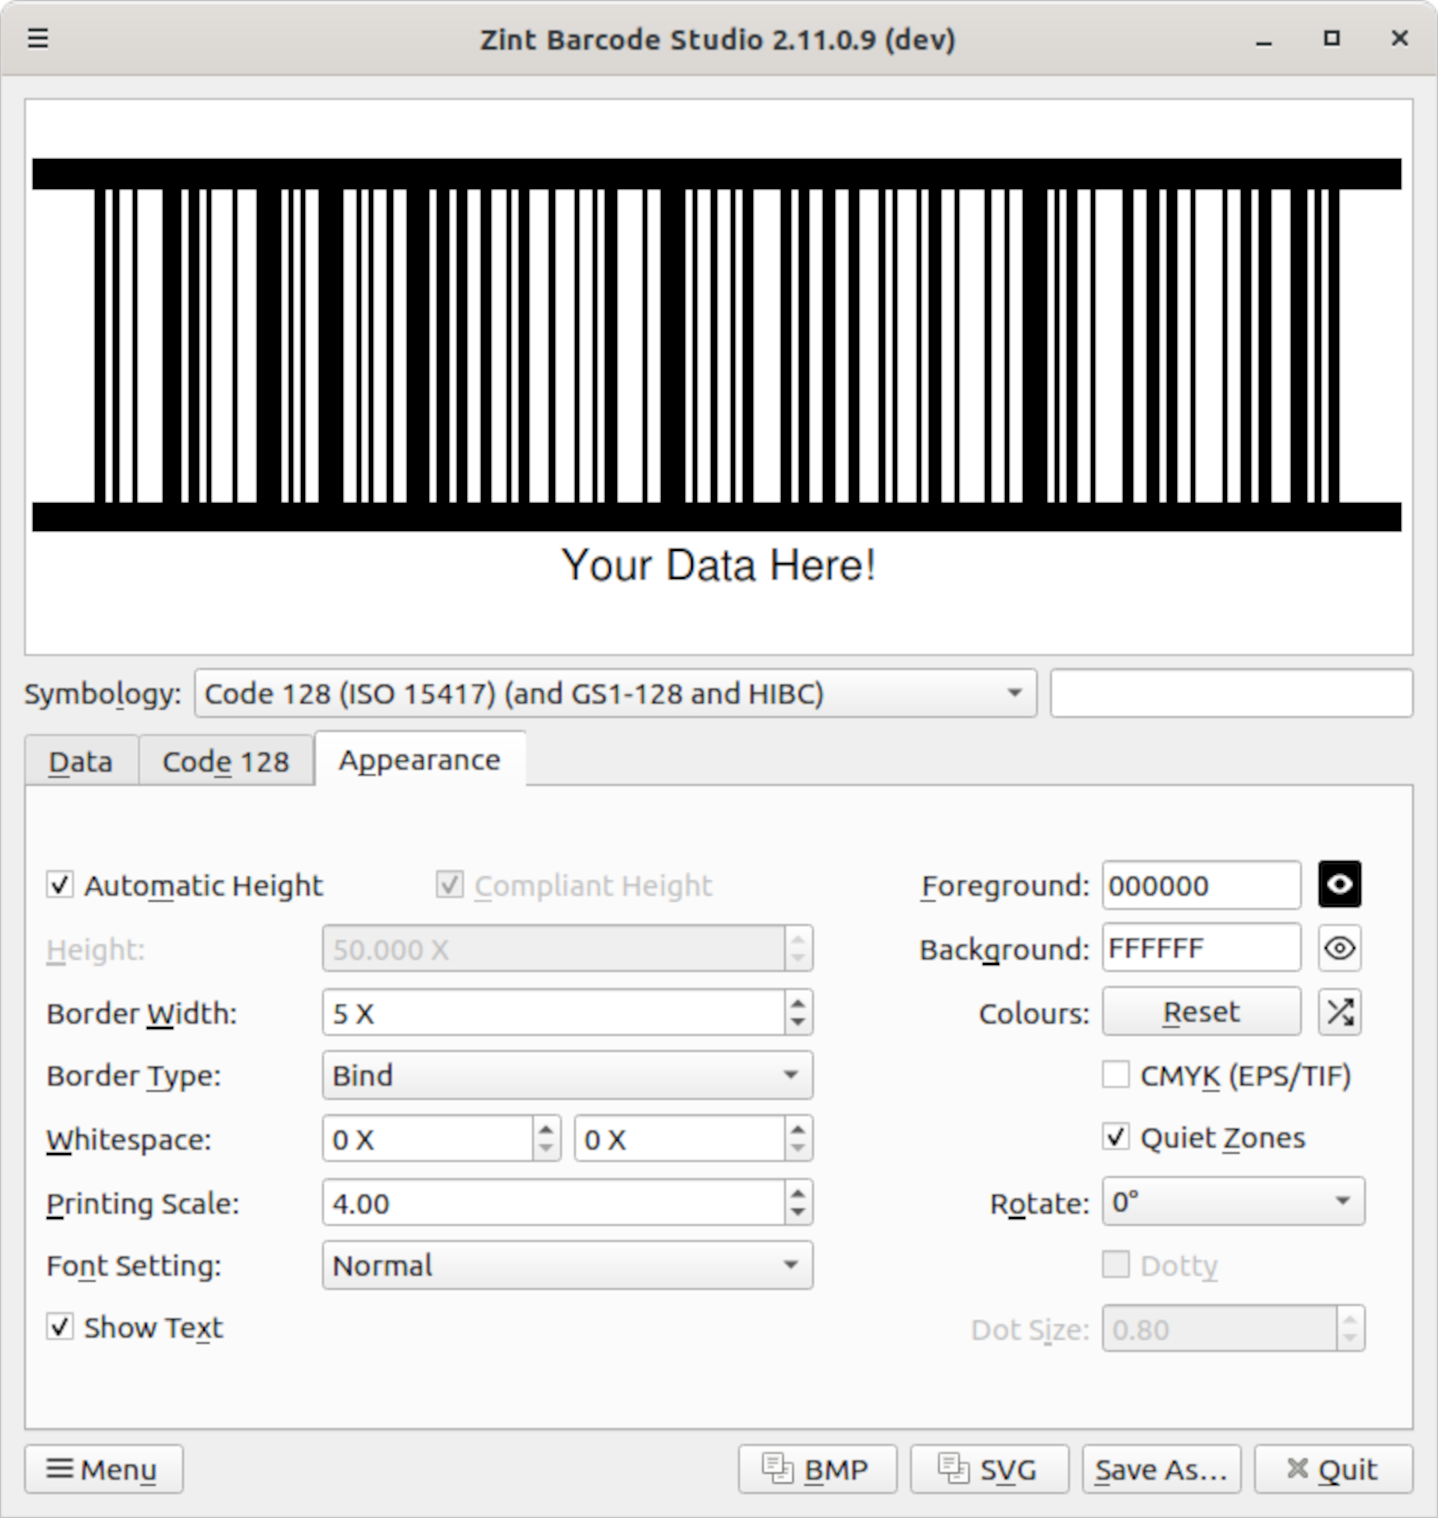
The Appearance tab can be used to adjust the dimensions and other properties of the symbol. The "Height" value affects the height of symbologies which do not have a fixed width-to-height ratio, i.e. those other than matrix symbologies. Boundary bars ("Border Type") can be added and adjusted ("Border Width") and the size of the saved image ("Printing Scale") can be specified.
3.6 Colour Dialog
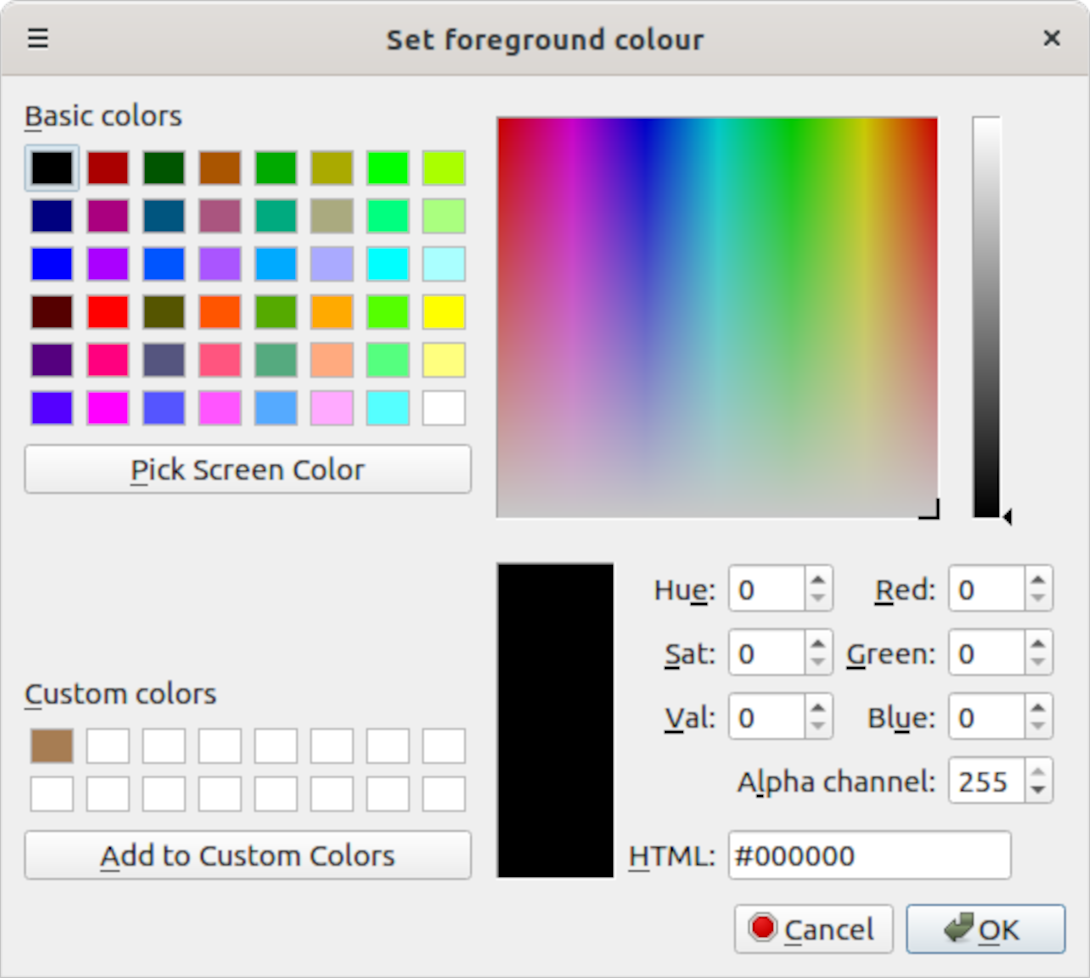
A colour dialog is used to adjust the colour of the foreground and
background of the generated image. In the Appearance tab click on the
foreground eye  or
background eye
or
background eye  button
respectively. The colours can be reset to black-on-white using the
"Reset" button, and exchanged one for the other using the
swap
button
respectively. The colours can be reset to black-on-white using the
"Reset" button, and exchanged one for the other using the
swap  button next to it.
3.7 Data Dialog

Clicking on the ellipsis "..." button next to the "Data to Encode" text box in the Data tab opens a larger window which can be used to enter longer strings of text. You can also use this window to load data from a file.
The dialog is also available for additional ECI/Data segments by clicking the ellipsis button to the right of their data text boxes.
Note that if your data contains line feeds (LF) then the data will be split into separate lines in the dialog box. On saving the data back to the main text box any separate lines in the data will be escaped as '\n' and the "Parse Escapes" checkbox will be set. This only affects line feeds, not carriage returns (CR) or CR+LF pairs, and behaves the same on both Windows and Unix. (For details on escape sequences, see 4.1 Inputting Data.)
3.8 Sequence Dialog
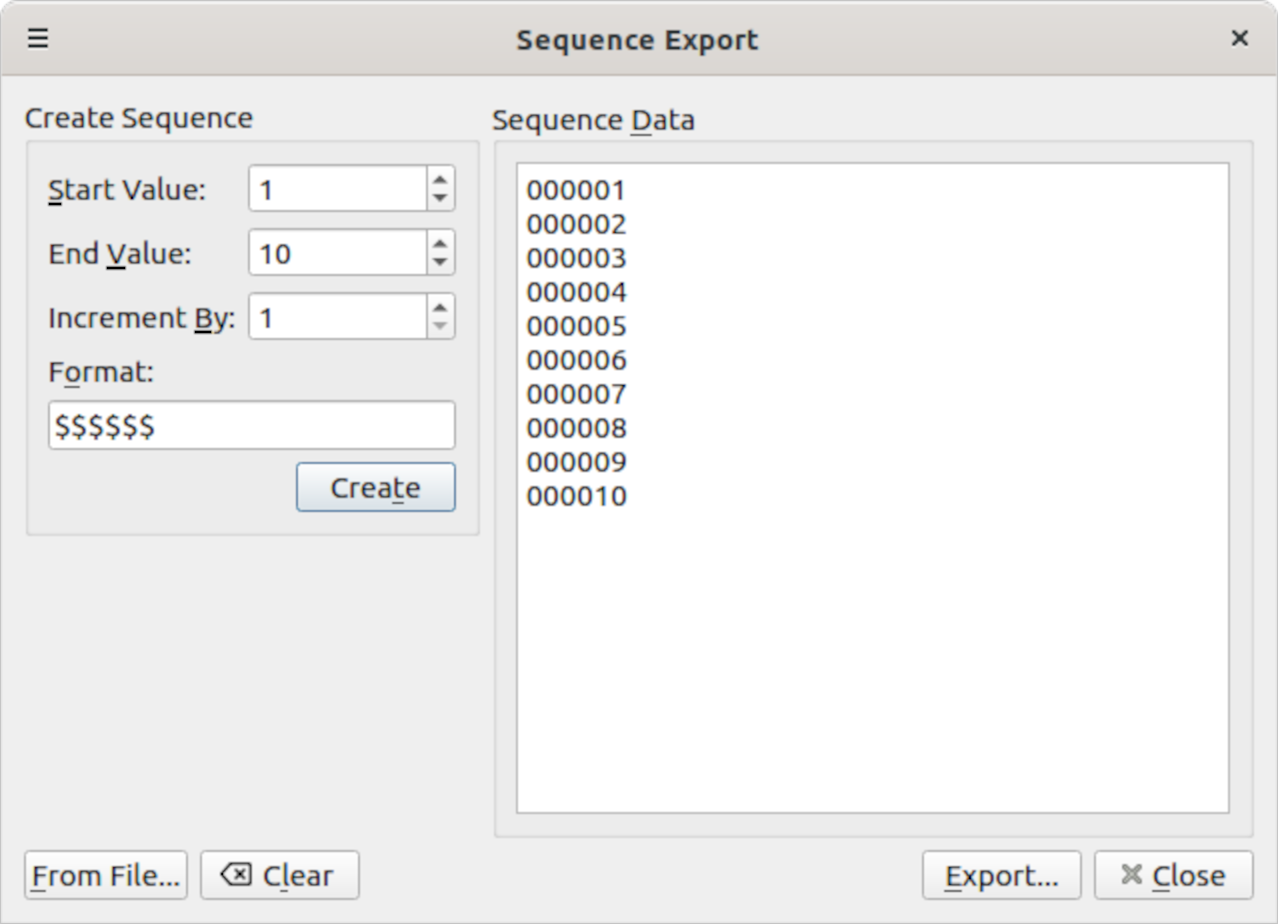
Clicking on the sequence button (labelled "1234..") in the Data tab opens the Sequence Dialog. This allows you to create multiple barcode images by entering a sequence of data inputs in the right hand panel. Sequences can also be automatically generated by entering parameters on the left hand side or by importing the data from a file. Zint will generate a separate barcode image for each line of text in the right hand panel. The format field determines the format of the automatically generated sequence where characters have the meanings as given below:
| Character | Effect |
|---|---|
| $ | Insert leading zeroes |
| # | Insert leading spaces |
| * | Insert leading asterisks |
| Any other character | Interpreted literally |
3.9 Export Dialog
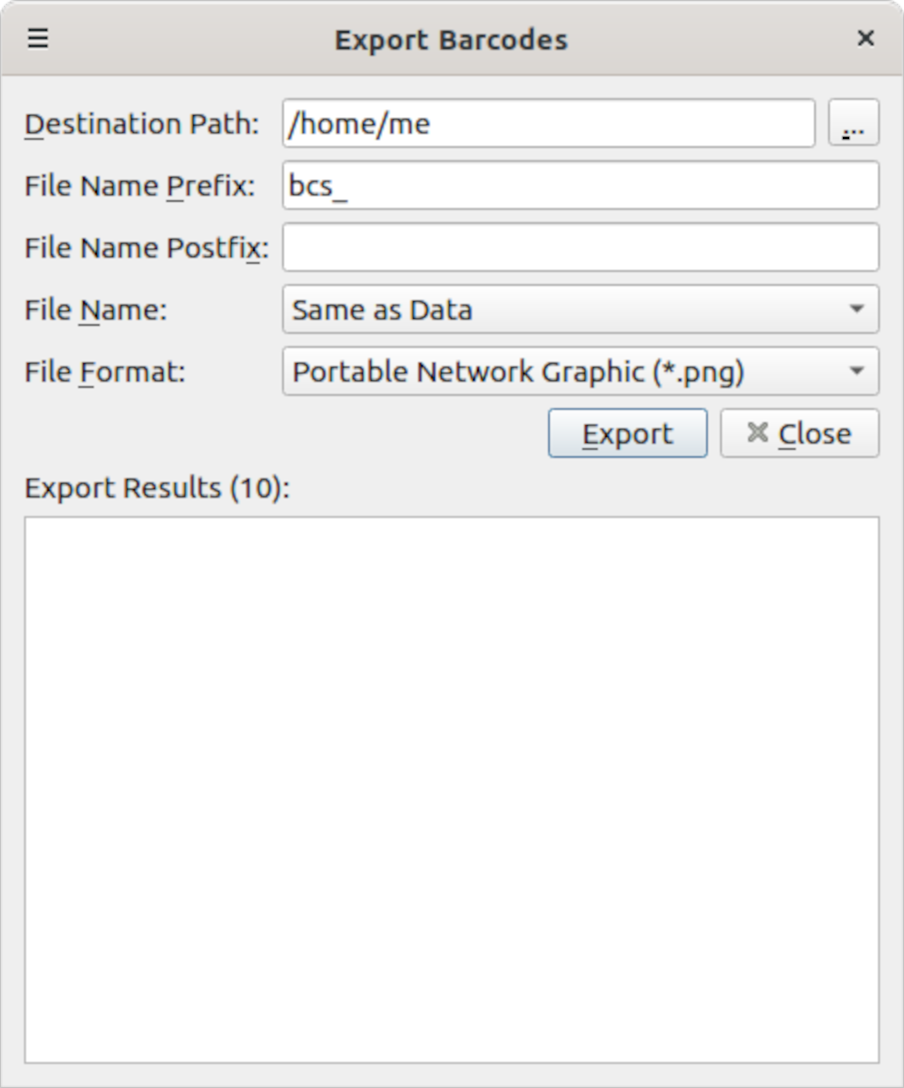
The Export Dialog invoked by pressing the "Export" button in the Sequence Dialog sets the parameters for exporting a sequence of barcode images. Here you can set the filename and the output image format. Note that the symbology, colour and other formatting information are taken from the main window.
3.10 CLI Equivalent Dialog

The "CLI Equivalent" dialog can be invoked from the main menu or the context menu and displays the CLI command that will reproduce the barcode as currently configured in the GUI. Press the "Copy" button to copy the command to the clipboard, which can then be pasted into the command line.